There’s nothing like foam rollers for tired and aching muscles. Use this best foam roller guide online to discover the amazing benefits of foam rolling.
You may have seen these devices online or in your local gym. Heck, you probably have a friend who has one at home. They’re super useful, they provide powerful results, and they’re cost-effective.
In this guide, we’ll explore what a foam roller is, along with the different types of foam rollers and what they’re specifically used for. You may be surprised how many different foam rollers there actually are. You’ll learn when and how to use a foam roller and how to integrate a simple practice into your day.
Check out this post: Best Foam Rollers for Muscle Pain and Soreness for the most popular rollers and cost.
This best foam roller guide will lead you into some specific foam rolling exercises that you can do to get into great shape. We’ll look at some tips for getting the most from your foam roller and discuss the most popular types. First, though, we’ll talk about the benefits of foam rolling.
What is a Foam Roller?
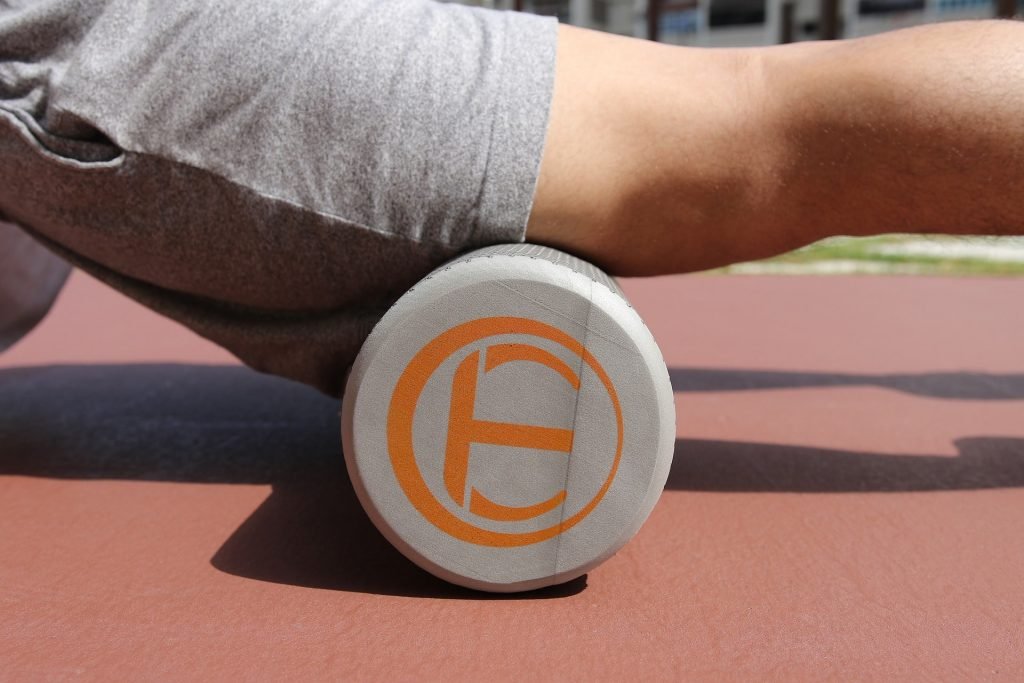
A foam roller is a tool. Generally speaking, it is a tube of compressed foam. The foam may vary in density and we’ll talk about why later in this guide.
Foam rollers also vary in length, with some being just a few inches long and others several feet long.
They’re used for a variety of purposes, including increasing flexibility, reducing soreness, and eliminating or reducing muscle knots.
You can foam roll just about every muscle in your body, including your calves, your back, and even your arms. But this is just the beginning. There are many benefits to using a foam roller.
What are the Benefits of Foam Rolling?
Understanding the benefits of foam rolling will help you stay motivated to use your chosen foam roller. It’s not always comfortable to use, especially if your muscles are sore. However, gentle use can and will help you feel better and recover more quickly. Having background information on the benefits will help you stick to your routine.
Improved Circulation
Foam rolling helps bring blood to your tissues, much like a massage. Gentle surface strokes with a foam roller or rolling device activate your cells and improve circulation. You may notice slight redness coming to the surface when you roll. This is the increased circulation to your tissues. Improved circulation means that your cells are getting what they need to recover, and waste products are being cleared away.
Myofascial Release
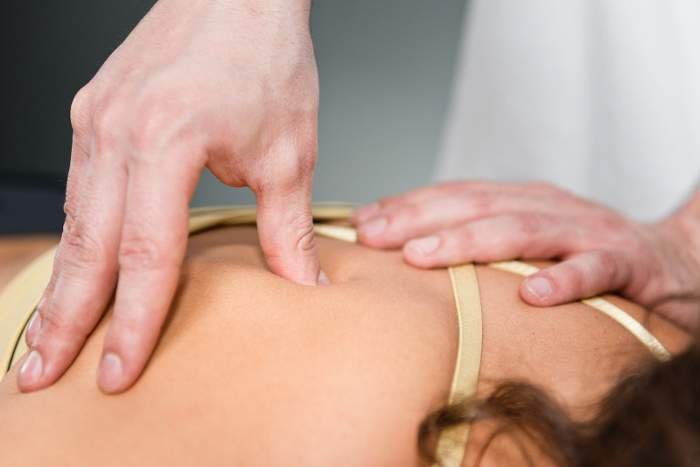
The fascia is the collection of tough membranes that wrap, connect, and support your muscles. Over time and with use they can become tight and even fixed to your muscles. Myofascial release is a method that works to loosen the tissue and adhesions to muscles. Often, when you feel a knot or a tightness or restriction in your muscles, it can be due to fixed fascia.
Using a roller loosens the tissues and helps improve circulation and mobility to the area. Many massage therapists incorporate myofascial release into their massages as they work over the muscles; they can tell where there are adhesions and can use trigger point pressure to help alleviate it. You can use a foam roller to much the same effect.
Reduced Muscle Soreness
You might be surprised to learn that using a foam roller can reduce muscle soreness. We’ve already discussed improved circulation and myofascial release; both of these benefits lead to reduced muscle soreness. They get the tissues loose, relaxed, and remove waste products from your muscles, which helps you recover more quickly.
Better Mobility and Movement
Fixed muscles, and sore muscles, restrict movement. By using a foam roller you’ll be able to lengthen and loosen tissues. Consider an experiment to prove this benefit. While standing, bend at the hips and try to touch your toes. Pay attention to how far you can reach and what your muscles feel like.
Then, foam roll the backs of your legs, your hamstrings, and your calves. Spend a couple of minutes on each side and then repeat the toe touching exercise. Notice the difference?
You will be thoroughly amazed at how rolling out your muscles is the best lower back stretches yet. I regularly implement some type of lower back stretches to for flexibility and have found rollers to be my best option.
Because you can foam roll all major muscle groups, a morning foam rolling exercise can help you feel more flexible and in control over your body.
Better Range of Motion
Range of motion means that you get more from your joints. For example, if you extend your arms overhead can you get your arms next to your ears or are your shoulder joints limited? For many, they’re unable to achieve this movement.
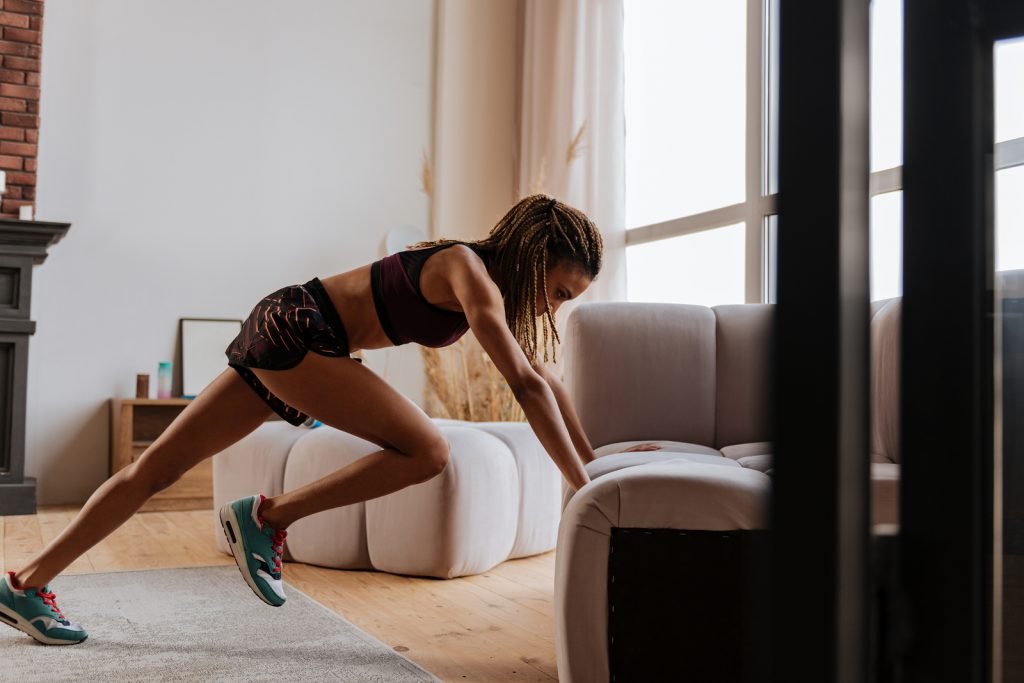
But with regular foam rolling to your rotator cuff area, you may be able to improve your range of motion. This is important because people often get injured when they push their range of motion. If you gain full range of motion in your shoulders, knees, back, and hips (your major joints) you’ll feel stronger and more capable.
Decreased Recovery Time
Foam rolling before and after a workout can mean the difference between two days of soreness and potentially no days of soreness. It’s that effective.
And if you are sore, you can reduce the soreness and the duration of your soreness with some gentle foam rolling that I think out performs lower back stretches.
Decreased Risk of Injury
We’ve already talked about an improved range of motion, improved mobility, and myofascial release. All of these benefits help support you to move your body in a more powerfully aligned way.
This means when you run, for example, you’re likely running with better form. When you lift something overheard, you’re likely doing so with better form. This reduces your risk of injury. If your muscles are tight and you’re restricted, it’s a recipe for injury.
Improved Fitness
Finally, you may be excited to learn that while your foam roller is absolutely a great device for pre-workout preparation and post-workout recovery, you can actually get a really great workout using your foam roller.
The benefits of foam rolling have to be experienced to be appreciated. Once you try your foam roller, you won’t put it away. Chances are, you’ll always have it within reach and you’ll quickly want to make it part of your day. Before you head to the store or shop online to buy your foam roller, it’s a good idea to know about the many different types of foam rollers and what they’re used for.
Types of Foam Rollers and What They’re Used For
The traditional foam roller, old school, was a solid cylinder of medium density foam. From those early days there have been many different adaptations and inventions. While you can’t go wrong with the old school foam roller, and it may be the perfect place to start, if you have specific issues or areas that you want to address, you may want a different type of foam roller. Let’s look at the major types so you can decide.
Rumble Roller
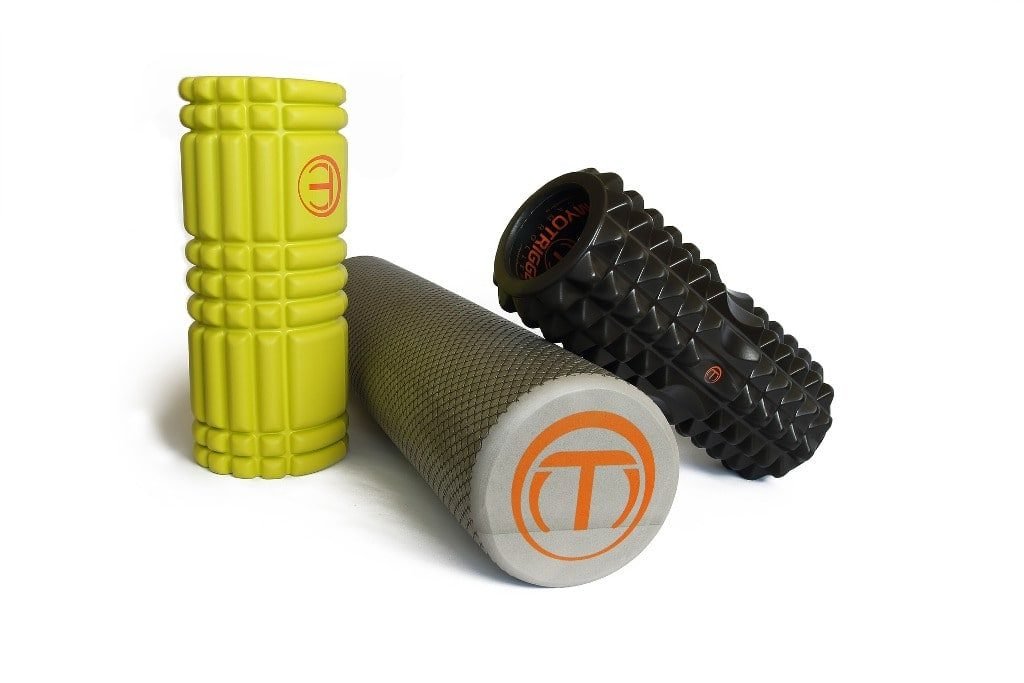
The Rumble Roller is a brand name. There are other types of rollers with a similar design and function. The Rumble Roller is a medium density foam cylinder covered with a textured surface.
This texture consists of “bumps,” each about 3/4 of an inch tall. These bumps work much like a massage therapist’s hands to “knead the contours of your body, gently stretching soft tissue (muscle and fascia) in multiple directions.” (RumbleRoller.com).
It’s good for reducing muscle soreness, improving flexibility and even reducing common types of muscle pain. Rumble Roller also offers a roller with a lower profile texture that is designed to provide a cross-friction massage, moving the muscles and tissues in different directions.
Traditional Foam Roller With Various Densities
The old school traditional foam roller is still one of the best investments. They generally come in soft, medium, and firm densities. You can often identify the density based on the color. Black is often the firmest, while green, blue, or even red are lighter.
Density matters because the more firm a roller, the deeper it is going to go into your muscles. However, too firm of a roller can leave you bruised. That’s not the goal!
For your first roller, consider getting a light to medium density roller. You’ll get a good benefit, and once you improve your technique and familiarity with the roller, you can increase the density.
We should also talk about the length and the width of a foam roller. Shorter rollers are easier to use in smaller spaces and they may be easier to manipulate, while a longer roller can be used on larger muscle groups.
For example, you can roll your back or both legs at the same time with a longer roller. As for width, if you’re striving to get into smaller spaces like your lats or neck, then you may want a smaller width.
Wheel
Using back stretches for flexibility is one of the best ways I’ve found for relieving back pain from tired and sore muscles.
The wheel is a roller designed for a very specific purpose — rolling, stretching, and massaging your back for flexibility and pain relief.
It looks like a giant ring or a wheel. So it’s generally hollow inside and varies in diameter. They also vary in the outer texture.
Like a roller, some are textured, and some are smoother. If you are seeking a more flexible back, hip flexors, chest, and shoulders then the wheel may be the right device for you. It can also help you improve your flexibility and strength in your back.
Double Roller or Peanut
The double roller is also often referred to as a peanut. It’s two foam or rubber balls connected in the middle. The roller can be used to loosen the fascia along your spine. You can also use it in your calves and the muscles along your sides. You can also put it on the floor and roll the arch of your foot over the top of one of the balls. Like rollers, some peanuts are textured, and some are smooth.
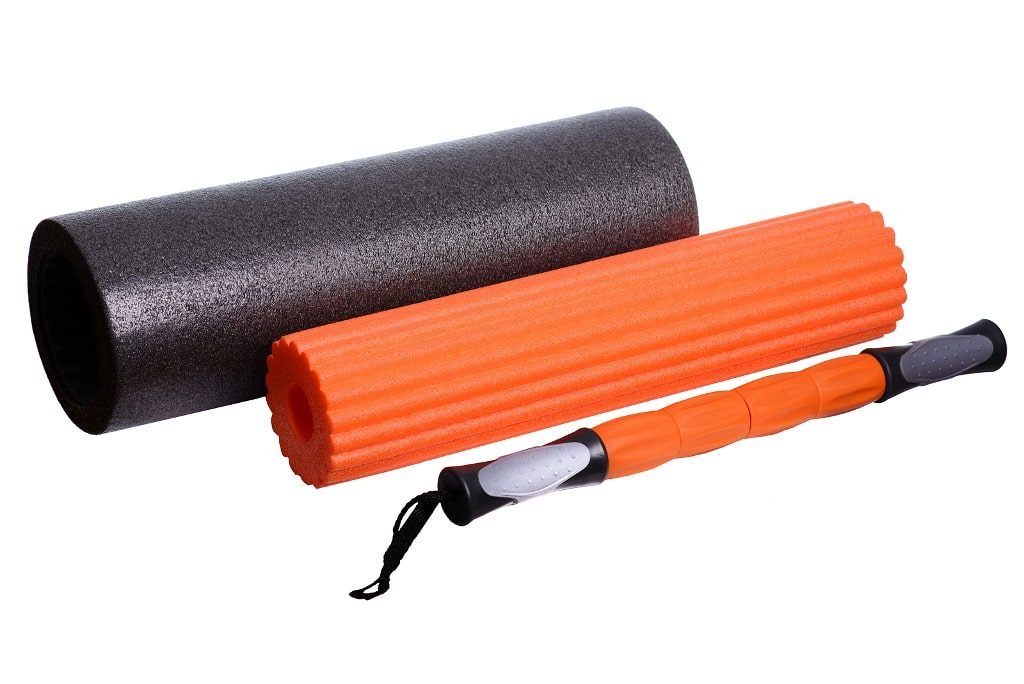
Grid
The grid roller is a foam roller with a textured grid on the surface. Like the Rumble Roller, the theory is that the texture helps get deeper into muscle tissue for better results. Grids are generally gentler than the trigger point effects of a Rumble Roller while also providing a similar benefit.
Stick
A stick roller is a lot like a rolling pin used in baking. It’s a stick that has pieces on it that roll as you push or pull it over your muscles. This type of device is fantastic for those easy to reach areas like your legs. (It’s perfect for major muscles in your legs.)
However, because you need two hands to use it, it can be difficult to use on your arms or even your back. It can be used on your neck quite effectively. Some stick rollers are hard, and some have a softer coating with some texture.
Hard Cylinder
If you really like to work your muscles deep then you might consider a hard plastic cylinder roller. These tools look like a large piece of PVC piping. They’re usually 12-24 inches in length and about 6 inches in diameter. Good for major muscle groups like your legs but may be too hard for arms, back, and sides.
Lacrosse ball
You might be surprised how effective a lacrosse ball can be to alleviate trigger point soreness. Lacrosse balls are hard rubber. They bounce, but they don’t compress.
You can put the ball between you and a hard surface like a wall or the floor and work a small area. Lacrosse balls are good for rotator cuff areas, feet, and your glutes. You can sit on the ball, cross one leg over the other and get deep into those muscles.
Tennis Balls
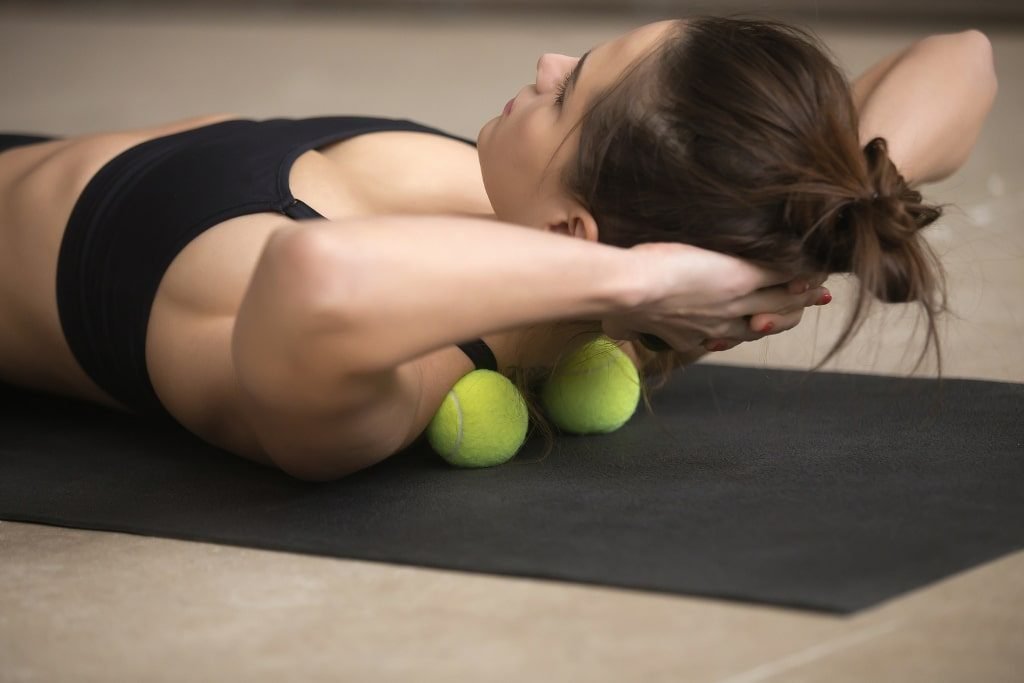
A tennis ball works just like a lacrosse ball but it’s more forgiving. They do compress, so if you’re new to rolling or have especially sore muscles, a tennis ball may be a good place to start.
Textured Balls
Lacrosse balls are smooth. Textured balls, like textured rollers, offer the additional benefit of working the tissues in different directions and with different depths.
There are, as you can see, tons of choices when it comes to choosing a foam roller. You just can’t go wrong by investing in a medium density foam roller. From there, once you have an established practice, you can add devices for your specific needs. Next, let’s take a look at the most common questions about foam rolling before we talk about specific foam rolling exercises.
6 Common Questions about Foam Rolling
While foam rolling isn’t a new practice, it’s new to many people and it can be a bit confusing. Before we dive into “how” to foam roll, let’s address the common questions and make sure you’re starting off with the best information.
1. Can Foam Rolling Be Harmful?
Yes. Foam rolling can be harmful. You should always start out with a gentle roll and gradually work into deeper rolls over time. If you jump right in and smash your tissues you could bruise your muscles.
2. Does Foam Rolling Work?
We talked about this a bit in the benefits section. It works a lot like a massage. It brings blood to the tissues and improves your circulation to the area, which helps your body repair itself more quickly. It improves flexibility by stretching tissues and working on adhesions and fixed fascia.
Think about it this way; you stretch before and after a workout to improve circulation to the muscles you’re going to use and to help reduce muscle tightness. Foam rolling works in a similar fashion, but you’re able to often get deeper.
3. Should I Foam Roll After A Workout?
Yes. And before. Before a workout you can use a foam roller to improve circulation. Quick rolls over your muscles that don’t go too deep are ideal for pre-workout warmups. You’re improving circulation and getting your muscles ready for your workout.
After a workout, you can slow down the roller and actually stop and press into the more uncomfortable areas. Get deeper after a workout and work out those knots.
4. When Should I Foam Roll?
We just talked about foam rolling before and after a workout. You can also foam roll between workouts or really any time during the day. Some people find that it’s a great way to start the day. Others like to foam roll while they’re watching television at night. You should foam roll when it suits your lifestyle and your goals.
5. How Long Should I Foam Roll?
It’s difficult to answer because it depends on your goals, how your muscles are feeling, and why you’re foam rolling. Generally speaking, a few minutes on each muscle group should be fine.
For example, when you’re foam rolling your IT band, the first few passes will feel fine, then it’ll start to hurt and you’ll probably find sticking points along your band that feel worse than others. As you roll and relax and breathe, the discomfort will start to lessen. Then you know that you’ve accomplished your goal for the day.
6. How Can I Tell It’s Working?
If a trigger point is really sensitive to the touch, massaging it may not make the sensitivity go away immediately. You should only roll a trigger point for about 30 seconds and then leave it alone. You will tell it’s working by the way your muscles relax, even though that could take an hour or so to become evident. There are people who say when rolling trigger points you should lie down immediately afterward to rest and allow muscles to relax.
Earlier we talked about that toe touching exercise. Depending on your goal for foam rolling, you can test and retest to evaluate any improvement.
For example, if you’re foam rolling to improve flexibility, range of motion, or to reduce tightness you can test the area before and after you roll. If you’re rolling to reduce muscle soreness, the best answer is to see how you feel the next day. Hopefully, your questions have been answered. Now that you know how you can benefit from foam rolling, the different types of foam rollers, and the basics, it’s time to look at specific exercises and how to do them.
Foam Rolling Exercises for Workout Recovery and Improved Mobility
Generally speaking, the practice of foam rolling is the same for each muscle group, whether you’re rolling your backside or your pecs, you’re going to make fluid and consistent passes over the muscle group when you’re warming up and you’re going to make slow and deeper passes when you’re post-workout or in recovery. During the week when you roll and post-workout, if you find a particularly sensitive or sore spot, stop the roller on that spot and press into it to get deeper. This approach applies to all of the following foam rolling exercises.
IT Band
Your IT band or Iliotibial band, is a tendon that runs down the length of the outer thigh, from the top of the pelvis (ilium) to the shin bone (tibia). When tight, as it is for most people, it can cause knee and hip pain and dysfunction.
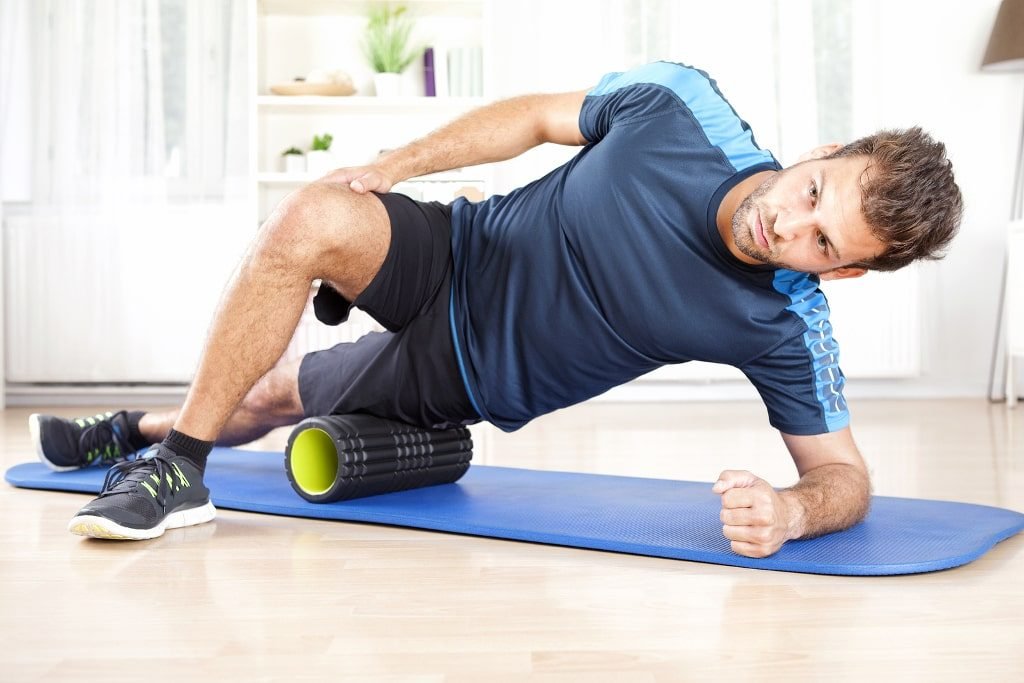
Rolling your IT band is something you should do several times a week. Warning, it probably won’t be comfortable. So here’s how to get started. Lying on your side, place the foam roller under your hip so it’s between your body and the ground. Support your weight with your upper body, and arm, so that you can pull yourself and move the roller gently down your outer thigh until it gets to just above your knee.
Make several gentle passes. Relax your muscles and continue rolling. If you’re post workout, you may find that you have a few highly sensitive areas. Rest the foam roller on these areas and allow gravity to pull you deeper into the roller.
Breathe. Switch sides and repeat on the other leg. You will likely find that one IT band is tighter than the other. If you’re a runner then you absolutely want to make sure you’re taking care of your IT band to prevent injury.
Thighs
Lie facing the floor with your hips on the foam roller. Use your arms to prop your upper body up and pull yourself so that the roller moves down the tops of your legs. Continue moving forward until the roller reaches the tops of your knees, then push yourself back so the roller moves up toward your hips. This is effective for rolling two legs at one time.
If you need to get deeper, then position the roller so it’s only under one leg. The other leg will be resting on the ground. Pull yourself forward and push yourself back to move the roller under your leg. You can rotate your leg to get the inside and outside muscles of your upper thighs and quadriceps muscles.
Hamstrings
To roll your hamstrings, start by sitting on the foam roller with your feet out in front of you. Lean back onto your arms and let your hands brace you as you pull yourself back and the roller moves toward the backs of your knees. Reverse the motion for several passes – relaxing your muscles as you roll will help the foam roller get deeper.
You can also deepen the pressure by placing one leg over the other and using the weight of the added leg to press your hamstrings against the roller.
Calves
Sitting on the floor, prop your legs onto the roller at your ankles. Bracing your hands onto the floor, lift your body and push it forward so that the roller moves toward the backs of your knees. Stop before it gets behind your knees and reverse the motion. You can stop the roller at sensitive spots, usually mid-calf, and work that area before making a few final fluids passes up and down your calves. You can also deepen the pressure by placing one leg over the other.
Back and Shoulders
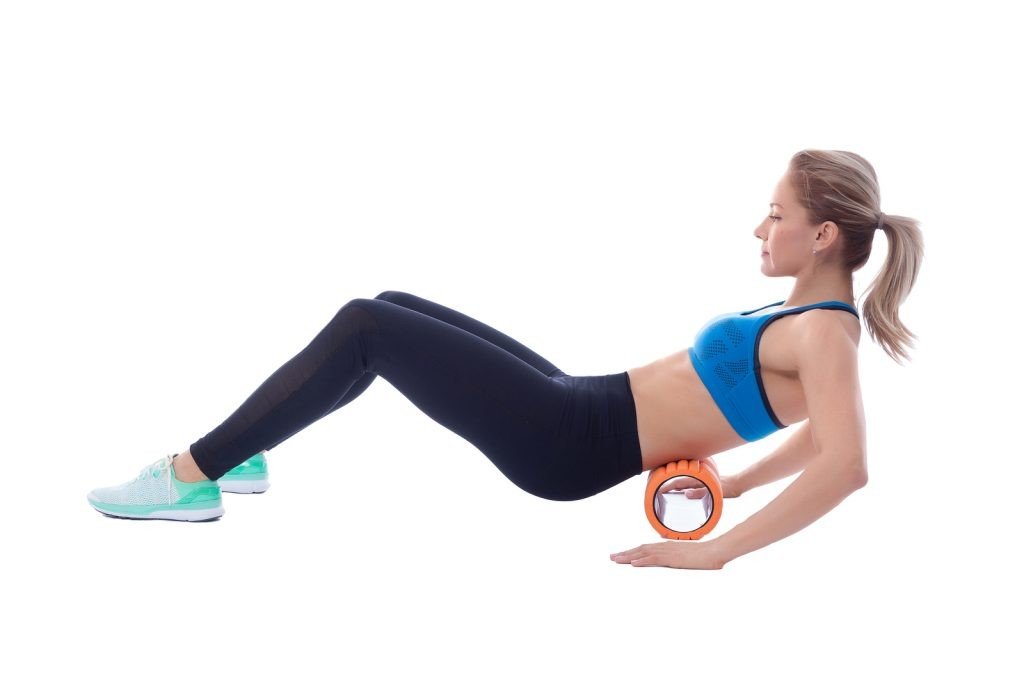
There’s nothing like using a roller for lower back exercises for rolling the tension and aches out of your back and shoulders.
Lie on the roller with the roller under your neck. Your core should be tight and your hips on the floor. Using your feet to push you, move the roller down your spine until it reaches the top of your glutes. Take care to keep the pressure at a comfortable level so there’s not too much compression on the spine. Relax your back muscles and sink into it with each pass. You might pause the roller in areas that feel tighter
Sides/lats
Lie on your side on the foam roller with it in your armpit and your arm reaching overhead. You can stay in this position and move your arm around using the weight of your body on the roller to work those muscles directly behind your armpit and into your shoulder and scapula.
You can tip your body forward and backward to also work those muscles. Then, using your feet to push you, move the roller gently down the side of your body, over your lats, until you get to your waist. Sometimes the ribs are too sensitive to roll, so you can stop when you get to an uncomfortable area. Switch sides and repeat.
Butt
Sit on the roller. Cross your right ankle over your left knee and lean toward the right side. You’ll feel the pressure on your right glute muscles. Using your left foot, push and pull your body so it moves back and forth on the roller. You can also shift your weight to get into the deeper places in your glutes.
You now have an abundance of exercises that you can perform with a simple foam roller. Get a wheel, a ball, a stick, or a peanut and you can perform many more exercises. Start with the basics and build a foundation. Add onto your foam rolling routine as your body requires. Next, we’ll talk about some useful tips for using the foam roller effectively and then we’ll discuss a handful of foam rolling exercises you can do to get into great shape.
5 Tips for Using Foam Roller Effectively
Using a foam roller is pretty easy. But there are ways to improve your results and to avoid injury.
- Start slowly – roll slowly at first. This gives you time to get a feel for your muscles and to find the sensitive/sore places. As your muscles begin to warm up, you can increase both the pressure and the speed you roll.
- Let your body create pressure. Gravity is your friend with the foam roller. As your muscles relax and you’re able to go deeper, simply allow your body to sink into the roller.
- If it hurts, ease back. You’re going to have sensitive areas. Try your IT band and experiment, you’ll likely find those areas. When you hit a sore spot, ease up a bit and gradually deepen the pressure to a level that you can manage. This isn’t a “no pain, no gain” practice. If it hurts too much, pull back. Think of it as a massage; you don’t want a massage to make you cry.
- Roll in both directions – Make sure you move the roller both up and down your muscle. Many people make the mistake of only rolling in one direction and missing half the benefit.
- Roll surrounding muscles – Let’s say that your glutes are sore, so you roll your glutes and then get on with your day. You would be better off rolling your hamstrings, hips, and even your low back in addition to your glutes. Your muscles rarely work in isolation and if one muscle is sore, it’s a good idea to look to the surrounding and supporting muscles as well.
These tips will help you get the most from your foam rolling routine. As you become familiar with the tools and the practice, your technique and awareness will improve. Before we dive into the last section, creating your foam rolling routine, let’s address some amazing foam rolling exercises for fitness.
Foam Rolling Exercises for Fitness – Using the Foam Roller to Improve Your Strength
Plank
You’re familiar with the plank movement, right? This is a movement where you balance the weight of your body on your toes and your hands or elbows. Keeping your core tight, the plank is a movement that works your entire body.
You can kick it up a notch by balancing your hands or forearms on a foam roller. Like planking on a balance ball, having to stabilize the foam roller adds a degree of difficulty to this basic movement. You can make it even more challenging by doing a side plank with the foam roller.
Pushup
From your knees or your toes, use the foam roller as the foundation for your hands when you’re performing a push up. You can also place the roller under your feet to elevate them and add a bit of an incline to your pushups.
Wall squats
A wall squat or wall sit is performed by getting into a sitting position (like you’re sitting in a chair) and pressing your back into the wall. It’s a good leg workout because you have to hold the position for as long as possible.
Now you can add difficulty to the movement by placing the foam roller behind your back and pressing into it as you slowly stand to upright and then slowly lower into a squat. (This is a similar movement to using a balance ball behind your back for wall squats. It requires you to stabilize your core.)
Glute Bridge
Lying on the floor on your back, place your feet on the foam roller. Tighten your glutes and lift your hips, keeping your shoulder blades pressed into the ground. You can perform reps or accumulate time holding this bridge.
Standing Lunges
With the lunge movement, your front foot will go on the roller as you lower your back knee to the ground. The trick for this movement is stability as you stand and lower. Make sure you’re able to perform a lunge on the ground before you try this on a foam roller.
Add these foam roller exercises to your current fitness routine and fast track your results. You’ll get great abs, a strong core, and the strength and stability you want. Between strength, flexibility, muscle recovery, and decreased soreness, you’ll want to make foam rolling a part of your day. Next, we’ll finish this guide up by talking about some tips to make foam rolling a part of your routine.
Creating Your Foam Roller Routine
Foam rolling is something that you can do every day. Depending on your goals, you may want to foam roll several times a day. It doesn’t take long; just a few minutes can make a huge difference. Use the following tips to help you create your foam roller routine.
- Morning Wake Up – Consider using the foam roller every morning to loosen your muscles. You can roll your back, roll the front and back of your legs, and then focus on anything that feels sore or stiff. Five minutes, or less, is all it takes.
- Television Commercials – If you watch television at night, consider focusing on rolling one area during each commercial. At the end of an hour, you will have been able to roll the major muscles in your body.
- Pre and Post Workout – If you work out, then consider making time before and after your workout for foam rolling. Roll for a few minutes before you work out to warm up the major muscle groups you’re going to use. After, roll those same muscles and go a little deeper.
- Soreness – Tend to any muscle soreness first thing in the morning, especially after lower back exercises? Rolling those sore muscles will help you recover more quickly, will reduce soreness, and will help you work out later in the day if that’s in your plan.
- Foam Roller Exercises – Rather than creating a dedicated foam roller workout, consider simply integrating this tool into your regular workout routine. For example, if you’re going to do an ab workout then add the plank movement on the foam roller to your routine. If you’re working on pushups and upper body, then add some foam roller push-ups into your workout.
A foam roller is a tool that can serve a multitude of purposes. It absolutely belongs in your fitness routine and is a worthwhile investment. If you don’t have a foam roller, it’s time to get one today and start putting it to good use. You’ll be happy you did
